
The Device Handler enables settings and features that are not regularly enabled with the installation of iblinds.
IMPORTANT: iblinds device handlers are only compatible with their specific device version.
Hubitat Device Driver
Note: As of the 2.2.4 Hubitat hub firmware release, there are a built-in basic iblinds driver included in Hubitat that does not require manual installation. You may use that driver, or you can use the iblinds 3.1 driver linked from this support page. The iblinds 3.1 driver provides a wider range of features and settings. See below for more on the iBlinds 3.1 driver and manual driver installation.
Manual Installation
- Make sure that the device is included with Hubitat.
- Download the specific iblinds Hubitat device driver via the iblinds GitHub
- Select All and Copy the code (Ctrl + C)
- Go to your specific Hubitat IP. (Can be found via portal.hubitat.com)
- From the drop-down menu in the top left. Select Drivers Code
- Select New Driver
- In the blank page, Paste the copied code (Ctrl + V).
- Press Save
- From the top-left drop down menu, select Devices.
- Select the iblinds device the driver was installed for
- Scroll down until you see Device Information
- From the Type* drop-down menu, scroll all the way down until you see User. Select iblinds
- Press Save Device
Preferences (V3 only)
To access the Preferences page, the DTH must be installed. Select the specific iblinds device you wish to edit, scroll down and change preferences as desired.
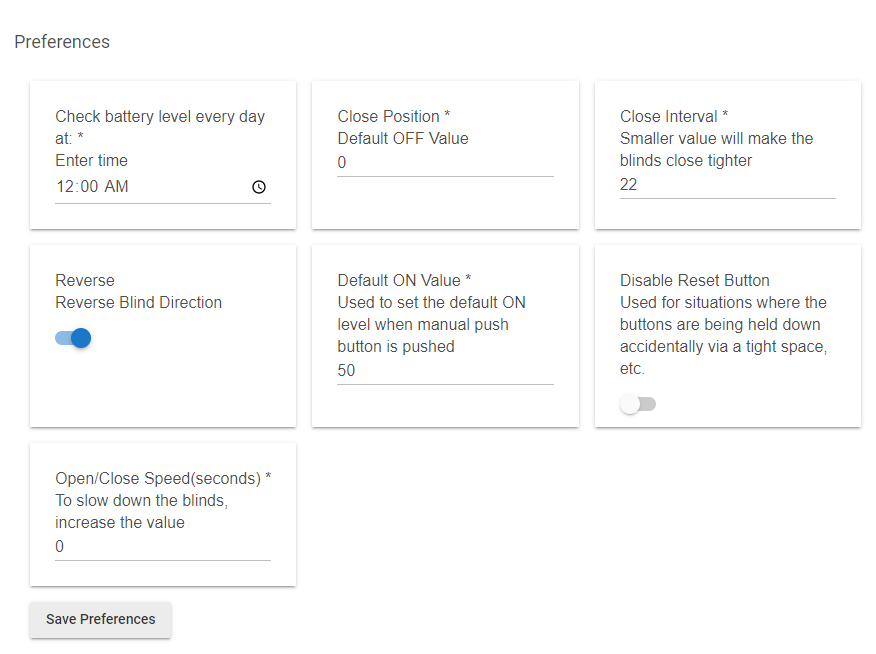
- Check battery level every day at *: Sets a schedule for a specific time every day to send a battery report to the hub. Do not report more than once a day; reporting more than once a day will drain the battery too quickly and will not allow iblinds’ battery to last extended periods of time.
- Close Position: Sets the default close position when the Off or Close buttons are pressed.
- Close Interval: A smaller value will decrease the loading interval between the tightened blind and the point of most resistance for the motor. Thus providing more closing power to the iblinds motor. Must be recalibrated
- The range for this preference is [16-32] and should be used carefully to avoid damage to the blinds.
- To tighten the blinds, provide a smaller value.
- To loosen the blinds, input a larger value.
- Reverse: Switches the direction of the opening/closing of the blinds.
- Default ON Value: Will set the default value to open to when the Open or On buttons are selected
- Disable Reset Button: Will disable the physical reset button on top of the iblinds. Used for situations where the button is not needed, or is enclosed in a tight space where the button may accidentally be pressed.
- Open/Close Speed(Seconds): Will change how fast iblinds closes to a position by default (On/Off, Open/Close commands). The range for this value is (5-100). If you do not wish to have a default Open/Close speed, then choose the Set Level command.(See Operation → Commands)
SmartThings Edge Drivers
With the SmartThings migration to Edge (the lua platform), custom device type handlers (written in the Groovy Platform) are no longer supported. HAB Home Intelligence has worked with SmartThings to incorporate the new iblinds z-wave device fingerprints (device definitions) into the SmartThings stock Z-Wave Window Treatment Edge Drivers. The window treatment edge drivers should be installed by the SmartThings Hub when needed, and your iblinds devices should automatically migrate to the new driver.
If, for some reason, the SmartThings stock Z-Wave Window Treatment Edge Drivers are not available; we have created an iblinds specific channel to allow users to install the new iblinds Edge driver. Please read all instructions carefully before installing the driver.
BEFORE YOU INSTALL
Drivers can’t be manually assigned to a device, so you’ll need to remove/exclude your iblinds device(s) from SmartThings first to try the Driver.
INSTALLATION
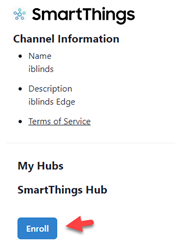
- Follow this link to the- iblinds Z-wave Edge channel and log in with your Samsung/SmartThings account.
- Accept the terms and conditions.
- Select to enroll your hub.
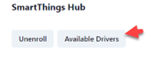
- Click the “Available Drivers” button.
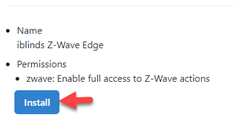
- Click the “Install” button for the iblinds Z-Wave Edge Driver.
- Wait a few minutes for the updates to be registered on your SmartThings hub.
- Join the device using the QR code scanning method or the “Select From List Of devices: By Brand” (manual inclusion) method.
- The device should be recognized as an iblinds Window Treatment.
- Rename the device and assign it to the room you want it in.
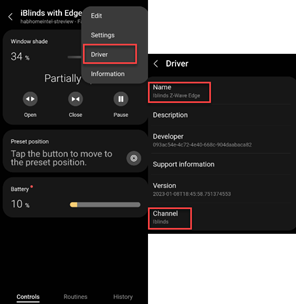
- Verify the iblinds Z-Wave Edge driver is installed by checking the device driver information tab.
If you are having any troubleshooting issues
- If the device is not identified by the correct driver or as the right product, try removing it and adding it again.
- If the sync status tile is empty, it should update to show the number of pending changes as soon as you change a setting.
SmartThings Device Handler (DTH)
***** Deprecated *****
Starting Jan 1, 2023, SmartThings has transitioned to the EDGE Platform, and Groovy Device Handlers (DTH) are no longer supported.
Manual Installation
First, join iblinds with the SmartThings hub (see the SmartThings Include)
- Open device-specific driver from the SmartThings public iblinds github, select raw and it will open a new window with the code, select all (Ctrl+A) and copy the code (Ctrl+C).
- Login to your SmartThings IDE at https://graph.api.smartthings.com (create a login if you don’t have one AND don’t forget to opt-in for the developer account). After logging into the above link, verify that you’re logged into the correct location by clicking on “My Locations”. Then click on the name of the location where you want to install the SmartApp. Note: You may be asked to log into your account again when you click on your location. If so, log in again.
- Click on “My Device Handlers”.
- Click on “+ Create New Device Handler” on the top right.
- Click “From Code”.
- Paste the .groovy code (Ctrl + V) into the editor and click “Create”.
- Click “Publish” and then “For me” on the top right.
- Click on “My Devices” on the top.
- Click on your existing device (ex: Family iblinds).
- Scroll down and click on “Edit”.
- Under “Type *” select the new device handler you just created (it will show up at the bottom of the list).
- Scroll to the bottom of the page and click “Update”.
- Open the SmartThings App on your phone and under “My Home” look for your new device.
Settings
The SmartThings Device Handler will enable the “Settings” for iblinds.
To access Settings:
- Select the specific iblinds device to modify
- Touch the “:” in the top right-hand corner
- Select “Settings” (If Settings is not shown, press Cancel and repeat from step 2)
- Modify
For device specific detailed features that are included in “Settings”, see Configuration / Settings
Operation
To operate iblinds within SmartThings, there are several control options.
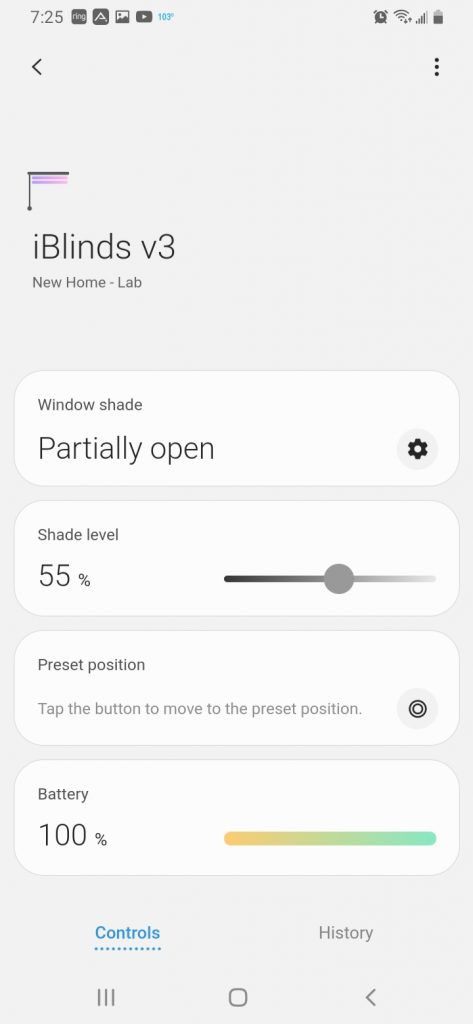
Gear: Will open or close iblinds and shows the current state of the iblinds
Slider: Shade Level, using touch, to move to a specific value depending on the slider location.
Preset: Opens to the Default ON Value defined in Settings. (Accessible in top-right corner)
Battery: Shows the current Battery level, to get an updated value, Refresh.
Refresh: Swipe Downwards from top to bottom. WIll update all current values.
For more advanced control options, see the SmartThings guide for Automations, Scenes, and Routines.
Athom Homey

Click the following link and click”Install”
https://homey.app/en-us/app/com.myiblinds/iblinds-V3/