OTA Updates are useful for updating the firmware without having to flash the chip memory with special equipment or send the device back to the manufacturer. Typically this feature is not available for Z-Wave devices since the physical Hub does not have the hardware capable of performing these kinds of updates. However, now we have the solution.
Warnings:
- Devices that are region specific, make sure you have a firmware file that is for your region.
- Some will require exclude/include when complete. This has been noticed on some instances. Most will not require this.
- This can only be used on 1 device at a time due to the shared memory requirement to enable this process.
What you’ll need:
- A Z-Wave USB stick / dongle from any manufacturer (Like the S2 Zooz, or HomeSeer Z-Flash) – if you’re using one with an open source set-up (Home Assistant, OpenHAB, etc) you can use the same Z-Wave stick here Click here for Product Page
- A laptop or PC with at least 1 available USB port
- Your device and an OTA firmware file received from our team (contact support@myiblinds.com if you don’t have the file)
- The PC Controller software. (File Below)
Getting Started:

- Insert the Z-Wave USB stick to a USB port on your computer
- Install the PC Controller Software
- Start the PC Controller software
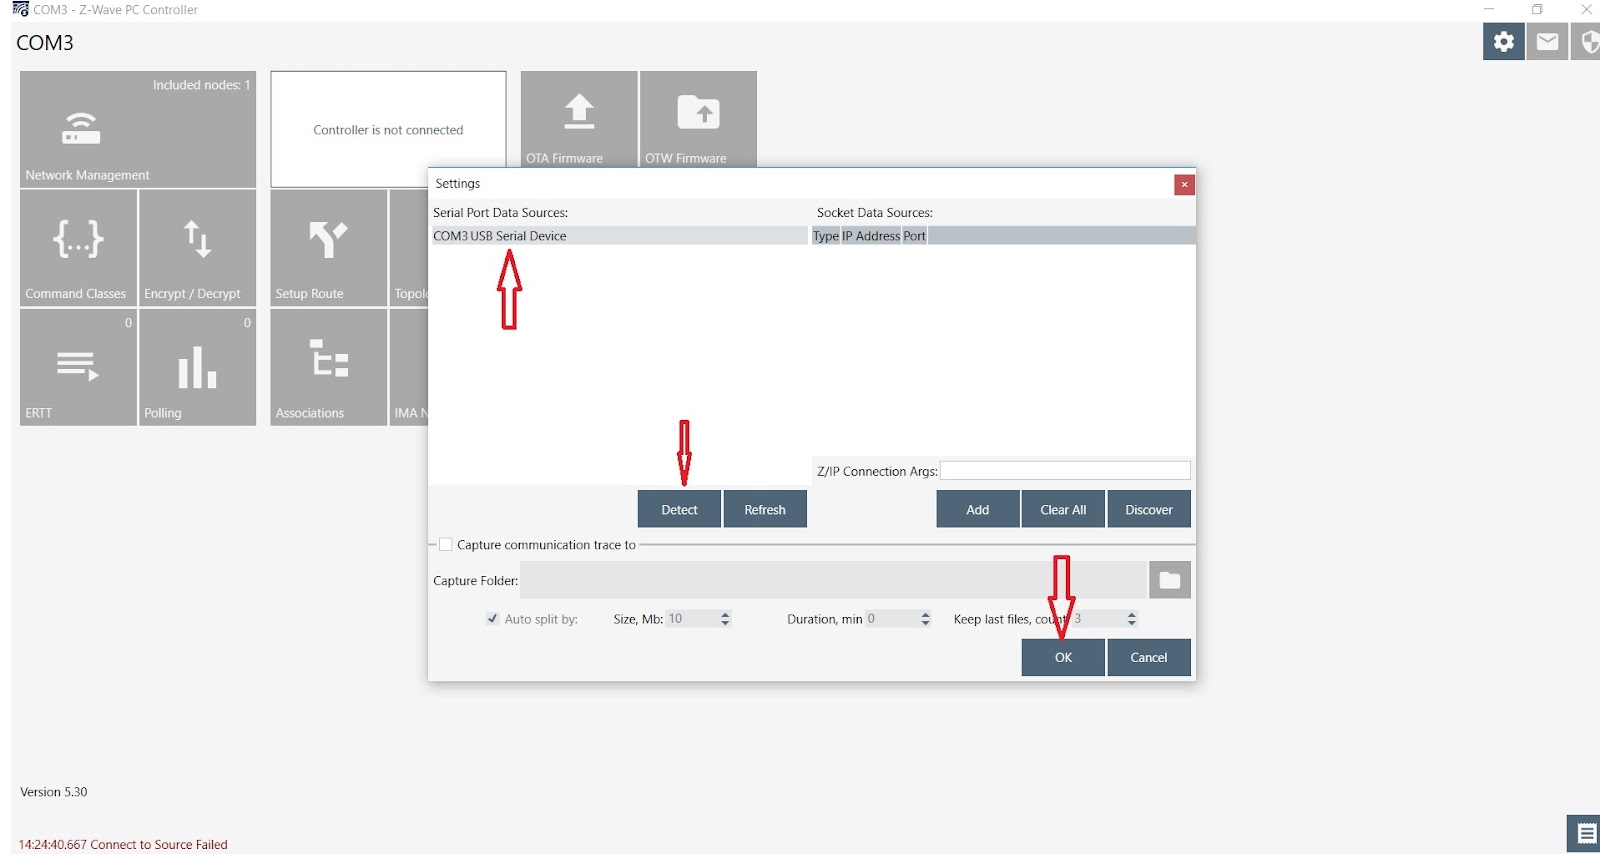
- Click on Settings (the gear icon in the top right corner)
- Check the recognized USB controller on the list in the dialog window. If there’s nothing there, click DETECT and then REFRESH. If the USB stick still doesn’t show up, you may need to install special drivers so please contact the manufacturer of the device for instructions.
- Click on Network Management
- Click on ADD to enroll the controller in inclusion mode, then activate your Z-Wave device the same way you did when adding it to your hub
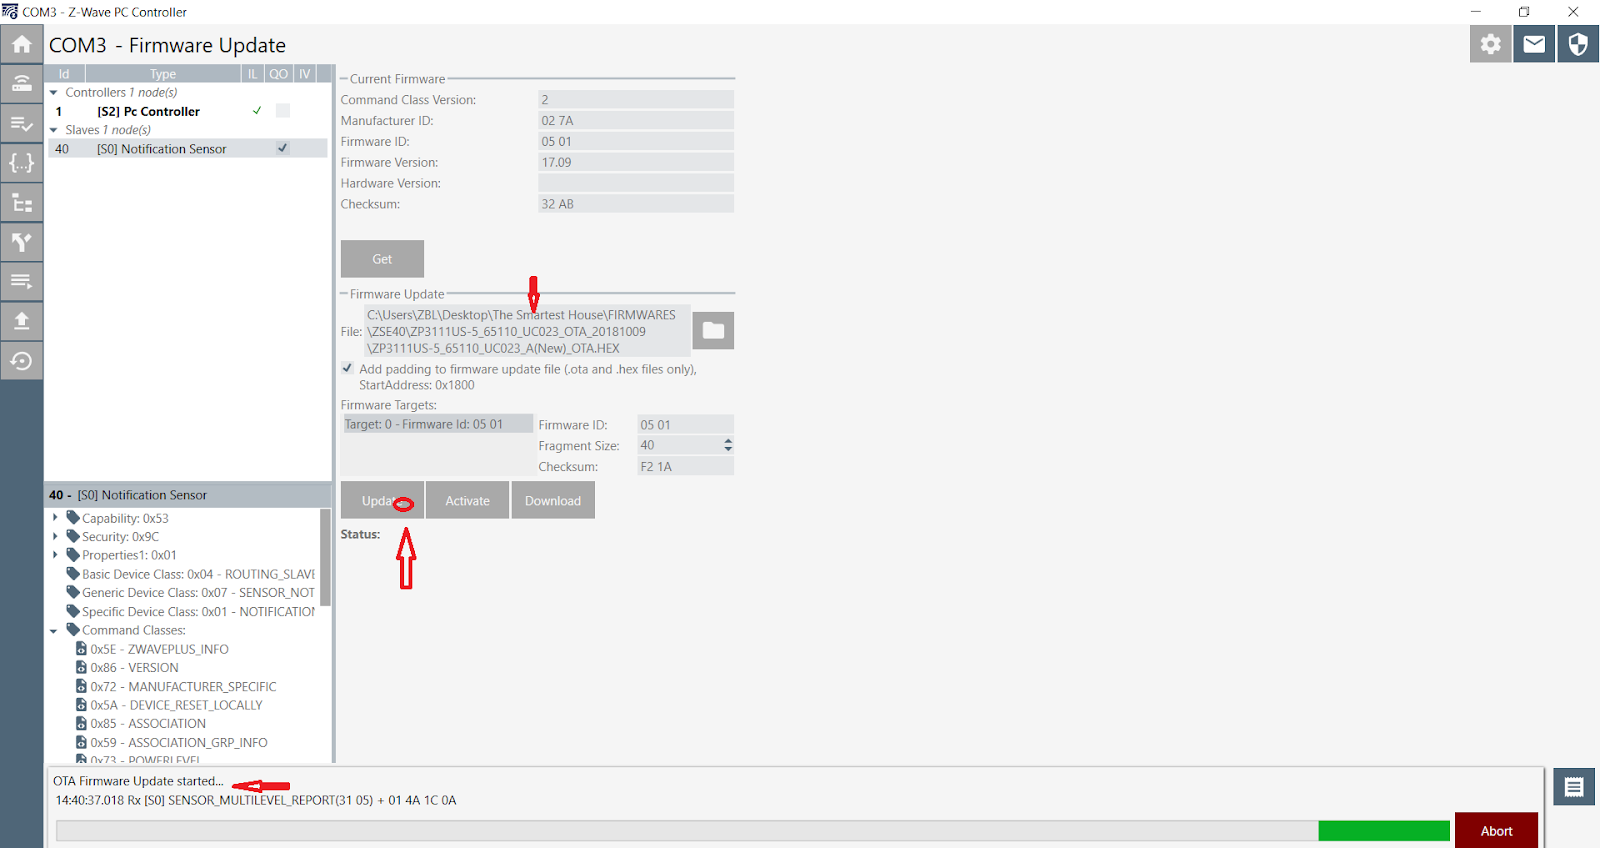
- Once the device is successfully included, please select and check it in the dialog window on the left. Then click on the OTA firmware icon (arrow pointing up) in the side menu:
- Select and check it in the new dialog window. You need to be able to see the current firmware version displayed in the upper part of the dialog window. Then click on GET.
- The folder icon will become active – click on it and locate the OTA .gbl firmware file, select, and open it.
- Once the name of the file name appears next to the folder icon, click on UPDATE and wait for the process to be completed. Progress bar will display on the bottom of the screen, followed by a “Success” or “Completed” message.
- Go back to the main menu and click on Network Management again.
- Click on REMOVE to exclude your Z-Wave devices the same way you did when removing it from your hub.
- Add the device back to your hub