
Generic Inclusion
- Follow the directions for your Z-Wave hub/controller to place it in the add for inclusion mode.
- Press the iblinds motor inclusion button (IN/EX) or the Charge Adapter button THREE (3) times quickly and wait for the device to be discovered and joined to the Z-Wave network. Follow the directions of your Z-Wave controller to uniquely identify your iblinds device. (Ex: Bedroom iblinds).
Note: If you continue to have trouble joining the iblinds motor to the Z-Wave network, follow the Z-Wave network exclusion process. If you are having trouble after following these steps, please check the Inclusion/Exclusion link to troubleshooting page.
Hubitat
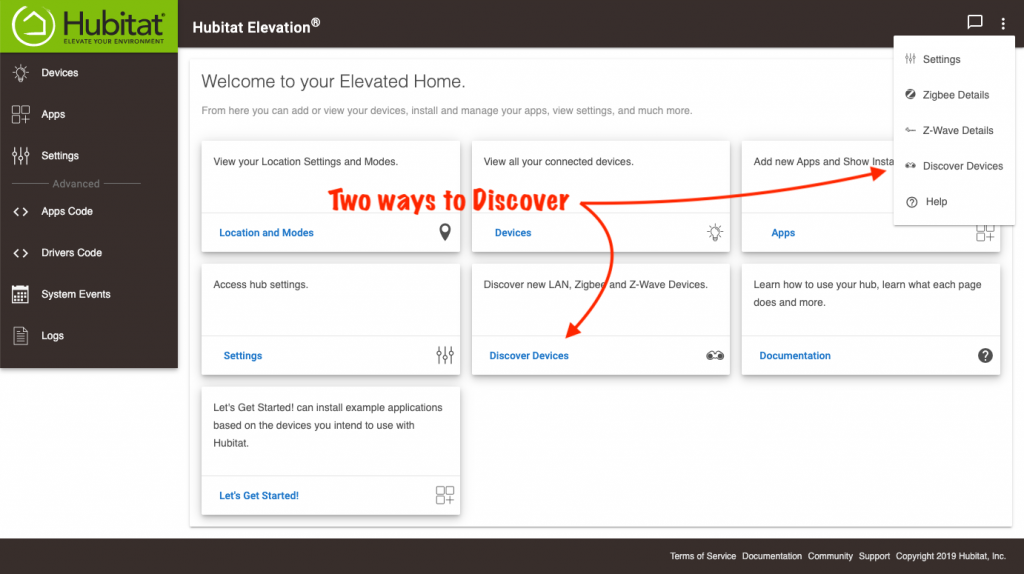
- Choose the Discover Devices link on your Hubitat Web Interface home page or from the menu at the top right.
- Select “Z-Wave”
- Click “Start Z-Wave Pairing”. (You can “Start Z-Wave Pairing” and this will put the hub into “Inclusion Mode” for 60 seconds. However, it is good practice to Exclude a Z-Wave device before trying to add it to Hubitat Elevation®. After each Z-Wave device is found, you need to start Z-Wave pairing again.)
- Press the IN/EX button on either the iblinds device or the charge adapter THREE (3) time quick in quick succession.
Homeseer
- From the web interface, use the drop menus to navigate to the Z-Wave Controller Management page (PLUG-INS > Z-Wave > Controller Management).
- Locate the Z-Wave Interfaces area and expand your Z-Wave Controller section with the yellow drop-down arrow. Open the Actions menu and choose Add/Include a Node.
- Click the Start button. Your HomeTroller is now in Add mode and is ready to communicate with your device.
- Press the IN/EX button on either the Charge Adapter or iblinds THREE (3) times in quick succession, and observe the adding process in the green log window. When done, you’ll receive an acknowledgment such as “Finished”. Your Z-Wave device is now a part of your Z-Wave network.
SmartThings
- In the top right hand corner press the “+”.
- Select Device
- Select iblinds
- Select Window Treatment
- Select iblinds V3
- When prompted, press the IN/EX button, or the Charge Adapter button THREE (3) times in quick succession, and wait for the device to be joined and paired.

Vera
It is highly recommended to use the Web Interface for Vera Applications
Web Interface
- From your Vera’s Dashboard, go to Devices > Add devices
- Select “Generic Z-Wave Device”
- When prompted, and given a timer. Press the IN/EX button on the iblinds or charge adapter THREE (3) times in quick succession
Mobile App
- From your Vera’s Dashboard, go to Devices
- Press the “+” in the top right-hand corner
- Select “Generic Z-Wave Device”
- When prompted, press the IN/EX THREE (3) times in quick succession