
Here you will find particular suggestions to assist you in installing iblinds with Alarm.com Panels.
Add an iblinds V3 Z-Wave Motor
- Place the panel into Add/Inclusion Mode. (see below if you need help)
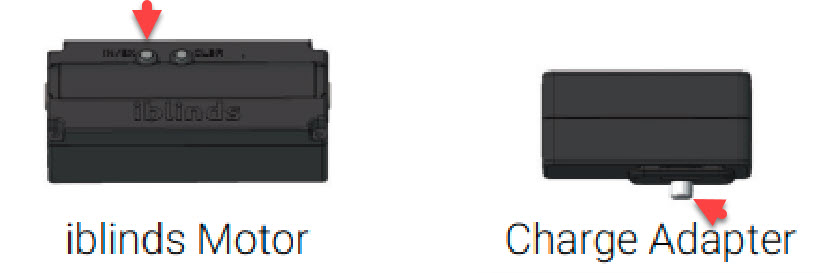
- Press the iblinds motor inclusion button (IN/EX) or the Charge Adapter button THREE (3) times quickly and wait for the device to be discovered and joined to the Z-Wave network.
- Follow the directions of your alarm panel to uniquely identify your iblinds device. (Ex: Bedroom iblinds).
Remove an iblinds V3 Z-Wave Motor
- Place the Z-Wave controller into Delete Mode.
- Press the iblinds motor inclusion button (IN/EX) or the Charge Adapter button THREE (3) times quickly and wait for the device to be removed to the Z-Wave network.
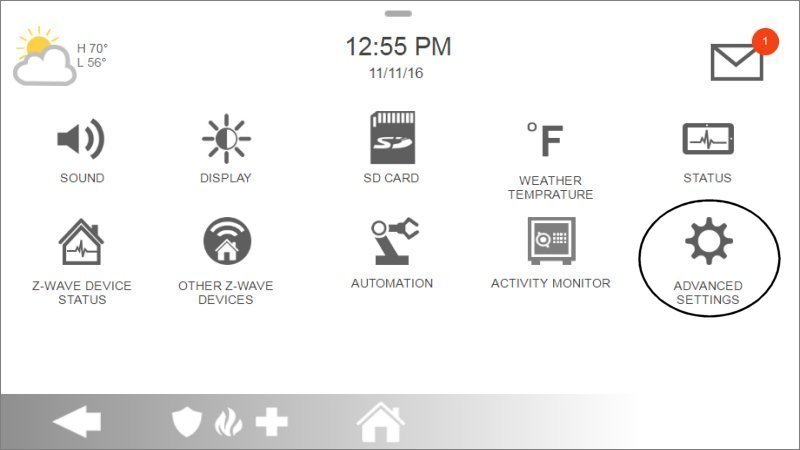
Putting the Panel in Add/Inclusion Mode (IQ2)
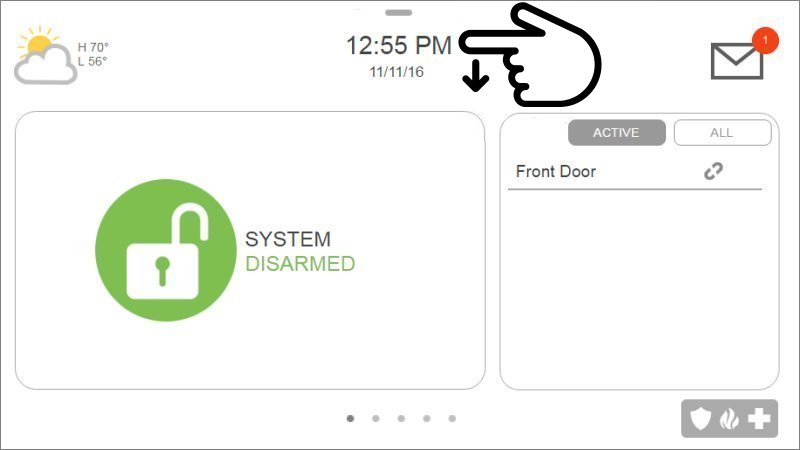
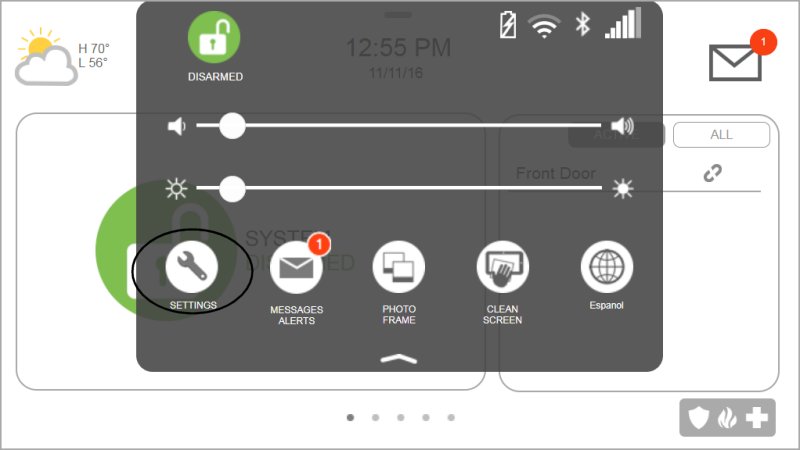
1. Press or swipe down the clock display at the top for Settings Tray, then press Settings.
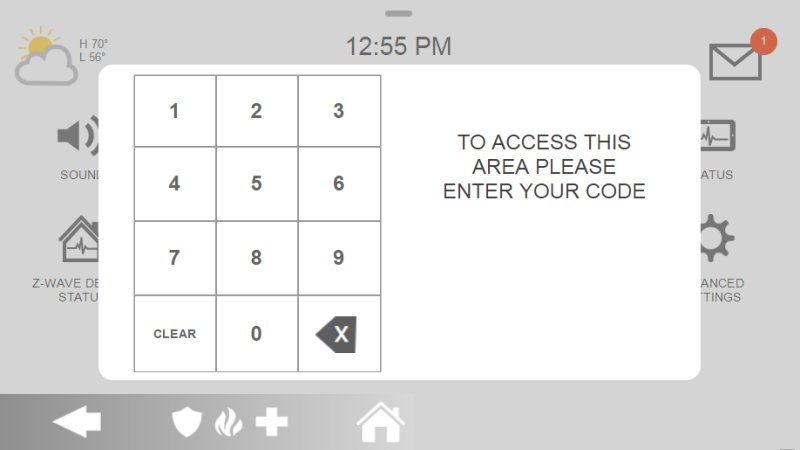
2. Press Advanced Settings, then enter the installer code.
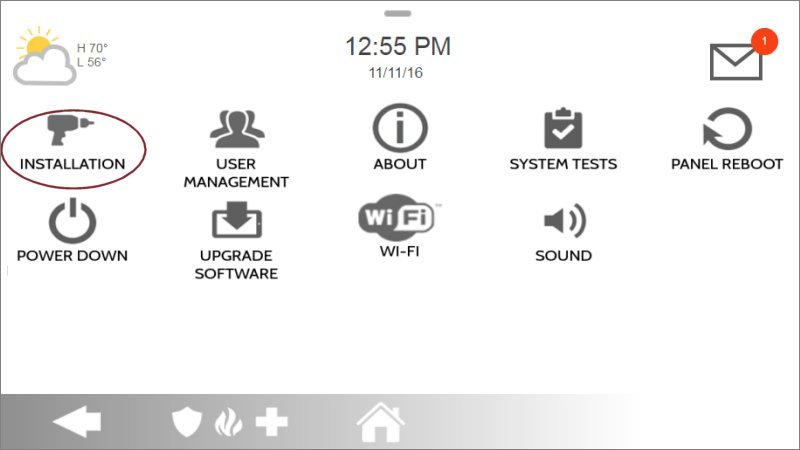
3. Press Installation, then Devices.

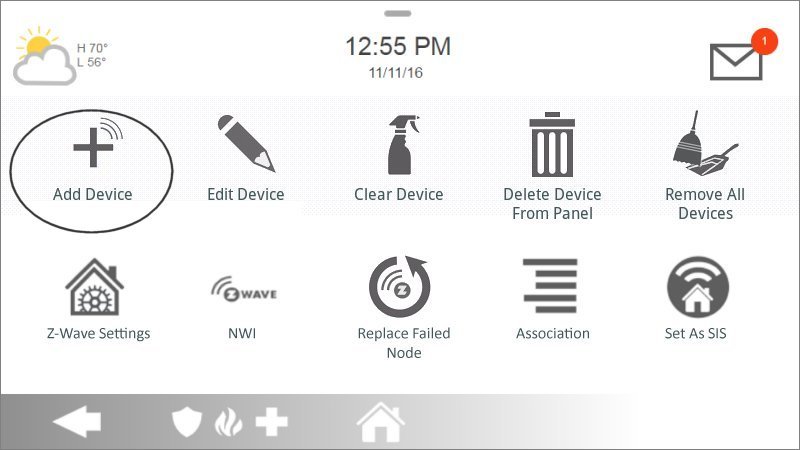
4. Press Add Device, then Pair.
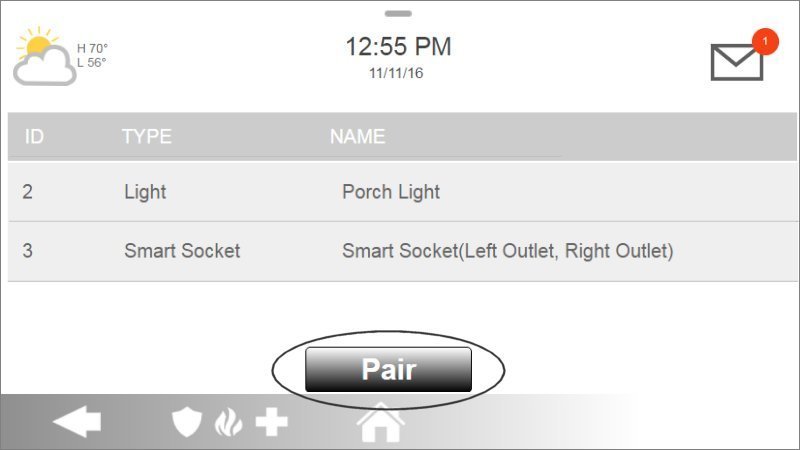
5. IQ Panel 2 enters Z-Wave learn mode, then trigger the iblind motor you want to include.
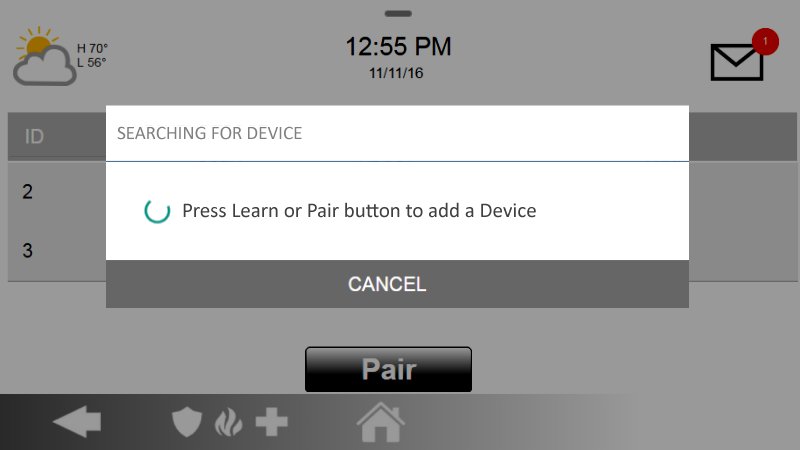
6. As the system enters learn mode, press the IN/EX button 3 times quickly to start including.
Final Panel Instructions
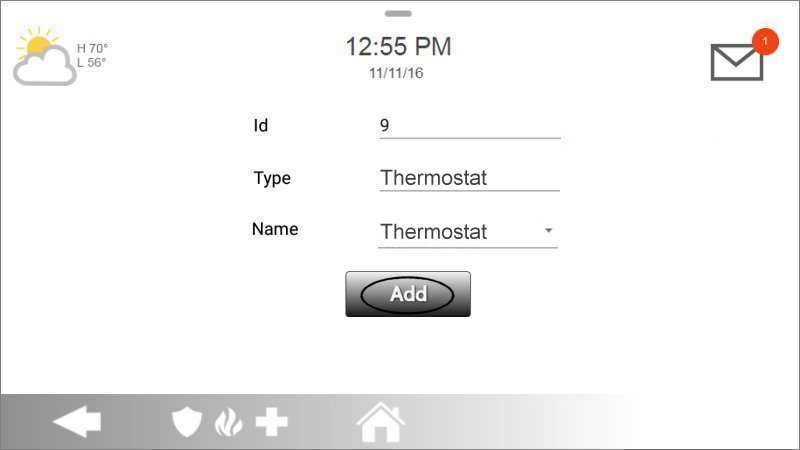
7. If successful, the IQ Panel displays device settings, press Name, then select the name.
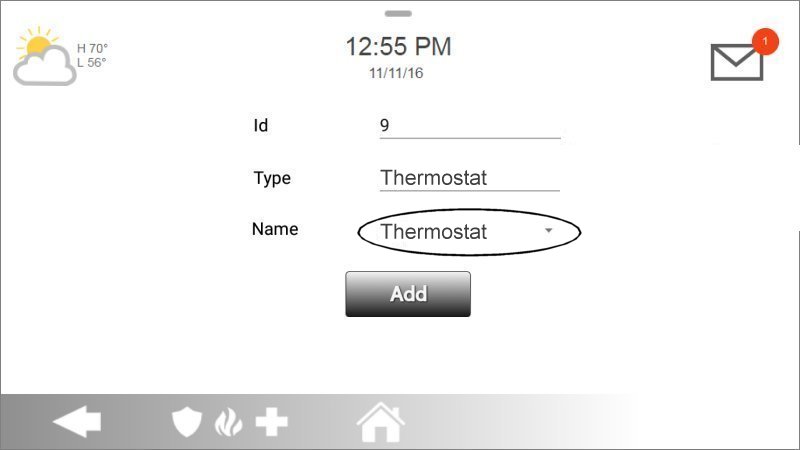

8. Press Add, then Home to exit.
Adding a Secondary Controller (Z-Wave USB Stick)
In order to adjust advanced configuration parameters on the iblinds motor, utilizing a secondary controller can be advantageous as Z-Wave parameter configuration is typically not supported by the majority of alarm panels.
What you’ll need
- A Z-Wave USB stick / dongle from any manufacturer (Like the Silcon Labs UZB, S2 Zooz, or HomeSeer Z-Flash)
- A Windows laptop or Windows PC with at least 1 available USB port
- Ability to put your Alarm.com Panel in Add/Include Mode
- The PC Controller software. (File Below)
Z Wave PC Controller v5.39
Getting Started
Install the Z-Wave PC Controller software and necessary drivers for the UZB Stick, then simply follow the step-by-step instructions provided in our helpful video guide below.
Supported iblinds motor control features
- Open/Close and level control using the Panel, Customer app, and Customer Website.
- Shade automation using schedules
- Shade automation as part of a scene
- Low battery notification