iblinds Installation
Note: This video is for iblinds v2 installation. v3 iblinds installation requires 3 IN/EX or charge adapter button pushes to include the device in the Z-Wave Network
Warning: When upgrading an iblinds unit do not use the V2 charge adapter with V3 iblinds motor, this will cause damage to the electronics. Always use the charge adapter that is included with the iblinds kit.
Tilt Shaft Change
Solar Panel Installation
The Solar Panel can be installed by using the included mounting brackets or by using 2-way tape.
Installation using Brackets:
- Lock solar panel into clear clips and use hooks to hang onto the back panel of headrail.
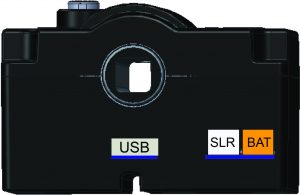
- Plug solar panel cable into the solar charging port SLR
- Plug battery cable into the BAT port.
- Turn on the battery.
- Install iblinds and mount blinds with the solar panel facing the window.

Note – Please keep in mind that the solar panel by itself does not produce enough power to run iblinds, it is only meant to charge the battery
